Showing posts with label tutorial. Show all posts

Tuesday, November 16

simple skirt

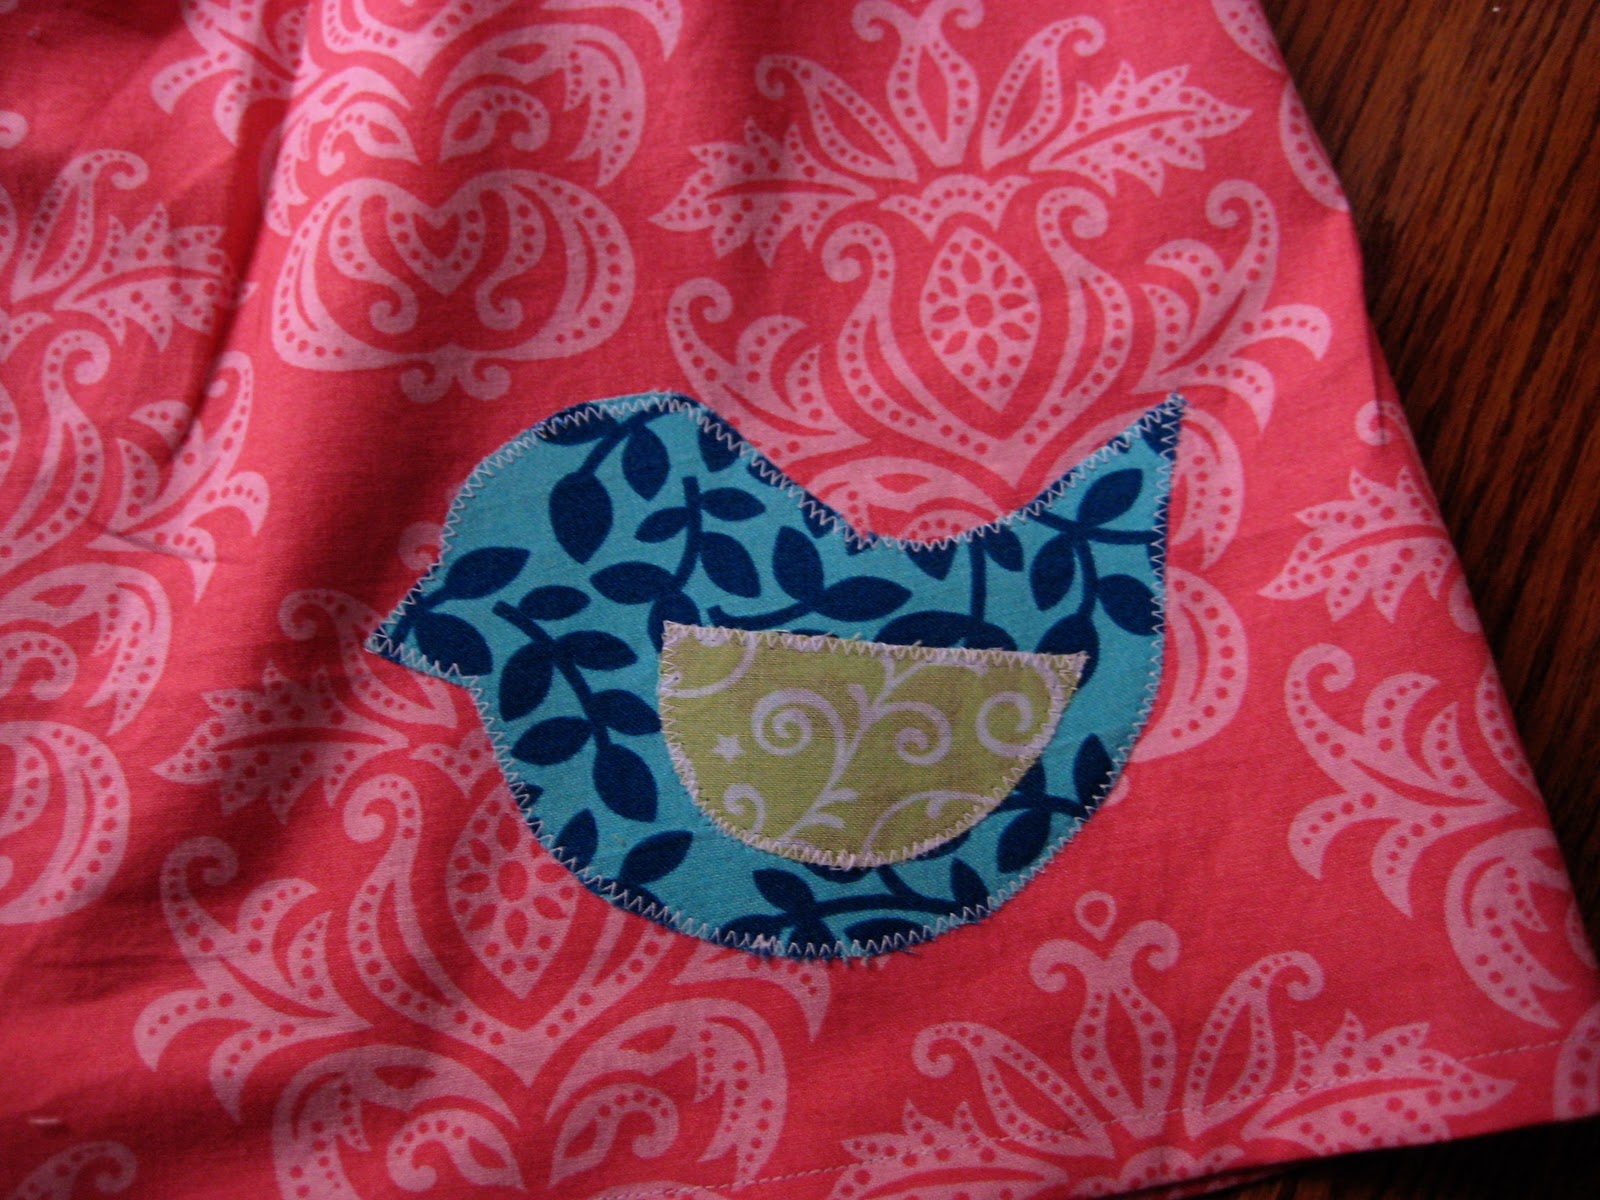
At my church, we're donating shoeboxes to the children of Haiti.  And this year, I decided to add in a few handmade gifts.   For the girl, (I like to do one for each child) I stitched up a little skirt.  It was so quick and easy!
Basically here's how I did it:
1.  Cut a strip of fabric, selvage to selvage, with the desired height.  I used  my daughter as a model.  I, then, added approximately 2 inches to the measurement.  

2.  Sewed up the side selvage edges with a 1/2 inch seam.  Press open.  Since the ends are selvages, they don't need to be finished off.  YEA!

3.  Fold down the top of the skirt at 1/4 in and then again at just shy of 1 inch.  Pressing down with each fold. This will be your elastic casing.    Edge stitch at the bottom of this seam leaving a 2 inch gap for inserting the elastic.

4.  Pin one end of the  (3/4 in wide) elastic to one opening to keep it in place.  Attach a safety pin to the other end and guide it through the casing.    Once through, overlap ends of elastic by 1/2 inch and sew several lines of stitching to keep them together.  Sew opening closed, being careful to not sew elastic.

5.  Smooth elastic through casing.  I like to sew a short line of stitching through the elastic at the seam line.  This keeps the elastic from turning.  I HATE when that happens!

6.  Hem the skirt by folding up 1/2 inch, press, and then another 1/2 inch and press.  Edge stitch along the bottom.

7.  Then I appliquéd a simple bird shape.  I used a light sewable iron-on adheseive to adhere the bird applique.  Then used a narrow zig-zag stitch to permanently attach it to the skirt.  Honestly, it took me 20-30 minutes TOPS.  So easy, and so sweet.


Sorry I don't have any pictures of the process!  I didn't think of it at the time, so typical of me.

Wednesday, November 10

Ruffle Bible Cover Tutorial


Ahem, here's my FIRST sewing tutorial.  Please be kind. :)

I realized a few weeks ago that my Bible was starting to look a little ratty around the edges.  But the last thing I wanted was an ugly Bible cover.  I could buy those all day long if I wanted to.  I hope that's not mean to say, but  I adhere to the idea of having nothing that isn't beautiful and useful.  So, I thought I'd finally whip me up a little cover and figured I could put ruffles on the front.  Why not?!  I live in the South so I can DO ruffles on my Bible and it's not over the top.    Honestly, the things I love the most are cute; my husband's cute, my kids are cute, my shoes are cute, why not make a Bible cover cute?

That being said, no matter how pretty your cover is, it's still won't be as beautiful as the words written inside.  That's your Bible lesson of the day.  Okay, let's get started.

First, you need to get your measurements and cut your fabric.  Just like women, Bible's come in many different sizes.  Find the length of your Bible from cover to cover including the spine by wrapping your measuring tape from the front edge of the cover around the spine to the back edge.  Add 1 inch to this number.  Find the height of your Bible (top to bottom of the front cover) and add 1 inch.  This is your dimensions for the exterior and interior cover pieces. You will need one interior and one exterior fabric panel, interfaced with your favorite method.  I used a lightweight iron on interfacing.

For the flaps that your Bible will slip into, you will cut a total of 4 (2 of interior and 2 of exterior) rectangles that measure the width and length of the front cover plus 1 inch all around. Interface all of those pieces, as well.  (I feel like that doesn't make sense...)

If you want a pen pocket cut a piece of material that is 8 inches x the width of your front Bible flap.  I didn't interface this since it will be double thickness.  (You'll see.)

Cut one 3" x twice the height of your Bible cover strip of fabric for the ruffle.  And one 2" x the height of your Bible cover strip of fabric for the center trim of your ruffle.  Clear as mud?

Now, let's embellish!  Take your large rectangle of exterior fabric and locate where you will want your ruffle to go.  I placed the center of my ruffle 3.5 inches from the right edge of the fabric.  That gives me room for a button and it's purposefully not placed in the middle of the front cover.   I like a little off centered-ness.  Take your ruffle strip and finish your edges with a zigzag or serge stitch.  Sew down the middle with a long, basting stitch.  Take a tail thread and pull up on the thread until the fabric ruffles down to the height of your cover.  Stitch in place to your exterior fabric cover.

Take your small strip of center trim and bring the long sides in to meet in the middle, wrong sides together.  Press down nice and smooth.  Place on top of the center of your ruffle, with raw edges underneath and edge stitch down both sides.   Sew a button on for closure about 1 inch or so from the right hand side, centered. Admire the cuteness for a moment.

For the handles, cut 2  4x22 inch strips of fabric and interface.  Fold each in half and press.  Open the strips and fold sides to meet along pressed seam and press again.  Edge stitch to one or both sides, your preference.

Next comes the pocket.  Fold the fabric in half so that it's 4 x width of Bible and press.  Top stitch at the folded edge.  Line up the pocket onto the right side of your exterior flap.  Pin and place and stitch down about 1.5 inches in from what will be the inside edge.  That way your pin will be closest to the spine.  The other part of your pocket is perfect for a notepad or gum or whatnot.  Pin your interior and exterior flaps, right sides together, and sew one side.  Make sure when your sewing the flap that has the pockets that you sew the edge that is closet to the pen part of the pocket.  Flip so the wrong sides are together and press and top stitch along the edge.

Now, let's build it.  Place your layers in this order:
1.  Interior, right side up
2.  Flaps, right side up
3.  Pin on the left side (opposite of where your button is) a strip of elastic cording about 3 inches long or so.  Make sure it's appropriate for the thickness of your Bible.
4.  Pin handles about 5 inches apart.
5.  Top with your exterior fabric, wrong side up


Sew all around with a 1/2 inch seam leaving a pocket about 4 inches or so for turning.  Reinforce the stitching at along the handles and the elastic cording.  Don't skip that part!  Trim corners and turn right side out.  Press, press, and then press again before top stitching all around.  I like top stitching with a slightly longer stitch (3 or 3.5) since your having to go through so many layers.  It makes it look nicer.

I'm so pleased with how it turned out!  What I didn't think about, though, was the fact on Sunday mornings my hubby and I share a Bible.  On many of those Sundays I help in the nursery while he goes on to Life Group (a more mature way of saying Sunday School) taking my Bible with him....  Um, yeah, he says he won't carry my ruffly Bible. :)  I don't see why not, he did take a Barbie thermos to work one day without any issues!

I really, REALLY, hope that this makes sense.  If it doesn't, let me know rather nicely and I'll clarify.  Okay?

I'm linking up here:


*UPDATE*  i made one for my daughter, which you can see here.  she loved it!

Tuesday, August 31

I am SO last year

This family rule canvas has been floating around in blogland for EVER I know.  I first saw the idea over at this blog I stalk daily, ahem.  But, I finally did one a few weeks ago, I don’t mind  being a little “last year.”  It's far from perfect, FAR from it.  I, however, gave up perfection so long ago, that I don't care anymore.  It's the imperfections that make life real.creation 002 copy

But, I think I like how it turned out, even if I’m not totally loving the quality of my work.  One day, I may try again and use scrapbooking stickers.
  creation 003 copy
But being the frugal person I am, I used what I had which was fabric, homemade modge podge, and transfer paper.  I’m a font lover so I have TONS at my disposal.  Simply print onto transfer paper (do not forget to reverse the design!!  I made that mistake a few too many times than I like to admit.)   Iron onto fabric, glue onto the canvas, and apply modge podge.  I use a mixture of glue and water.  creation 005 copy
I added some ric rac and ribbon to break it up a bit.  I’m not loving however the way the transfer paper looks a little shiny.  Oh well.  Like I said, I can always redo it one day.   And I don’t like how I didn’t quite take the time to even up the edges.  I think I was trying to hurry and complete this before the big kids came off the bus and the baby woke up from his nap.   But, it feels the space in nicely and adds a little color. 
More importantly, it tells whomever comes in our home what we believe and value as a family.
creation 004 copy
The rules are:
Love the Lord your God
Keep your promises.  Integrity matters.
Wash your hands
Clean up, even if you didn’t make the mess
Be respectful.  Talk nicely.
Read more…watch tv less
Always tell the truth
Obey your parents
There’s no mine in this house…it’s all God’s.  (LOVE that one!)
Be nice to your siblings…encourage them, stick up for them, believe in them.
Be creative. Laugh at your mistakes.  Embrace the possibilities.
Mind your manners.  Say “please” and “thank you.”
Husband love your wife.  Wife respect your husband.
Say your prayers, thank God for this family.

Thursday, August 5

today is brought to you by the letter "H"

Yes, we watch too much Sesame Street around here, but anyways.  I've been wanting a cute letter H (for our last name) to decorate around the house for a long time now.  Being the frugal minded people we are, though, I couldn't justify spending a lot of money on one.  So I made one.

Here's what I did and it's super simple.

I took a paper mache letter and a pretty piece of scrapbooking paper. Trace the letter to the back side of the paper.  Then I used a trusty can of spray paint from our stash to give it a good coating, luckily I had a coordinating color.  I used the tricky can of spray adhesive to stick the paper to the letter.  Once dry, I used a mix of white school glue and water to paint over the whole thing.  (It's cheaper than modge podge, like I said we are frugal)


I saw where someone else had pinned a cute little paper flower on a letter and LOVED it.  So I cut out three layers of "petals" to create my flower.  I glued a thumbtack to the back of a fabric covered button I just happen to have on hand (lucky me) and viola!

Though, if I'm totally honest I don't know if I love it.  I mean I like it, but do I LOVE it?  Regardless, I'm sure the baby will find it and tear it up in no time.  Seriously, he's already thrown the phone at the lamp leaving a black mark.  He's cute, but he's a stinker.

LinkWithin

Related Posts with Thumbnails