Showing posts with label home decor. Show all posts

Thursday, February 21

new pillow!

i was lamenting last night on facebook the difficulty of sewing with knit fabrics.  is anyone else with me on this?! several years ago, i did make my youngest son the cutest and comfiest pj pants out of a nice, thick, easy to work with knit.  he loved them and wore them forever.  he looked so precious in those pants!  and then feeling all confident or something, i thought i'd make myself a knit skirt.  i had several from old navy, i think they called them yoga skirts, and i live out of these type of skirts in the summer.  i figured it'd be fun and easy to make one just like it, i mean i DID make the pj pants. 

i managed to make one even though i had my doubts about the quality.  you know, it looked handmade and not in the cool, indie handmade kind of way.   i even wore it one time to an outdoor concert with the hubbby.  it was a not a "good outfit" night for me, esp. with the shirt i had paired it with.  the man taking the ticket thought i was pregnant...in his defense i do have a large abdominal separation and look perpetually 5 months pregnant, but still it's never cool to look pregnant when you are not pregnant.  that comment, along with the most massive pimple smack dab between my eyes that night just seemed to taint the whole outfit!  i haven't been able to wear the skirt or shirt ever again.  they were banished from the wardrobe rotation forever. 

but i loved the color and feel of the knit i made the skirt from and hated to just throw it away. so i sat on the fabric for a good year until i thought i'd try my hand at knits again, this time in  a pillow.


oh, i love it so!  i'm so glad i didn't "chuck it in the river"  like i wanted to do.  stitching the knit "shags" were super easy, mainly because i cheated.  i sewed the strips onto a knit background and knowing how slippery it would i ironed on some interfacing to the back making it nice and stable.  the problems came sewing the knit front to the knit back pieces.  luckily, the picture doesn't show the poor seams nor does it show the big hole i was able to hide in the seam allowance luckily.  nor does it show the huffing and puffing sounds i made trying to sew it.  if i were ever to do this again, i'd definitely use a user friendly cotton as the background. and i highly recommend that to anyone wanting to make a similar pillow unless you're just one of those freaks of nature who can bend the evil knits to their will.  unlike me.   

i give this pillow about 24 hours before my daughter sneaks it for her own bed.  i do love it now so much more than when it was a skirt.

Thursday, December 1

painting again

so, remember when i painted the foyer and the dining room?  i finally painted the living room that's between those two rooms.  but, am i the only one who finds that starting one project often leads to another?  like a project snowball?

the thing is my living room is the first room you see when you come inside my house.  it also happens to be my creative space.  which happens to be a mess more often than not.  of course, if you were to come over i'd throw everything in plastic bags and hide it in the garage clean it up first.  unless you were my mom.  she's seen the mess and she still loves me.  i started painting it and then it DAWNED on my finally to switch our formal living room with the family room that is situated right behind it at the back of the house.  we couldn't do this when we first moved in because the cable outlet was in the family room and so it seemed natural to have the tv and couch and all that there.  but since we got rid of cable a year ago, we haven't been tied to the cable line.  yes it took me a year to realize that, but whatever.

the thought hit me mid-morning to switch the furnishings and so i jumped on it.  i knew i had a deadline, the kids would be home in about 4 hours.  the hubby shortly after that.  i had to get it all done before he came home all while taking care of a three year old.  patience is not my virtue, neither is thinking through ideas.

i did it though.  i emptied all the fabric into plastic bins (i even managed a hardware store run within those 4 hours), moved all the children's books and craft supplies out.  switched furnishings and i even moved the piano. by myself.  across the carpeted family room.  i wasn't playing around.  i'm even a little surprised with how quickly i did it.  needless to say, when my two big kids came home off the bus they were floored to say the least.

after much deliberation, here's the before of the formal living room.


oh, wait. that's a cute kid.  

okay, i'm going to take a deep breath and show the living room, my craft space, at it's worst...okay normal.  it's really bad.  like really bad.  but i'm being so honest here.  (my hubby will probably hate me for posting this pic)


i'm only showing a portion of it mainly because it was the only picture i had.  you can see where i've already started painting when the mood to switch rooms hit.  seriously terrible, right.  it was one of those things where i get going to make a project and then couldn't  find what i was looking for and so i had to search through everything and then a kid would call me and need me and i'd have to leave the project to help the kid and then it'd be time to make dinner and then i'd have to clean up dinner and then get kids to bed and by then i was too tired to go back to the project.  and so it would sit there until the next day and the cycle would start over again.  

onto prettier things now, okay.  forget the last picture.  really forget it, esp. if you know me in person
brought in the couch from the family room, end tables were in the garage since i didn't have a place before for them.  thomas is the only toy allowed to live in here. i like having a room that isn't taken over by kid toys.

brought in my fav blue thrifted chair.  i raised the curtain rods and added a fabric swath to lengthen my existing curtains.  one went missing during the move.

the black cabinet used to hold my fabric, now it holds my tv.  like it's supposed to. 


ahhh...it's so much better now.  and it actually stays clean like this.    (of course, right now there is a tree in it and things were moved around a bit to accommodate that.)

i'll show the family room which is now a craft/play space a little later.  i'm still working out the kinks....

Tuesday, November 8

Hello

so, my house is nearly 40 years old and apparently it was really cool to have a stained glass door for you home at that time.  yellow and orange stained glass, to be exact.  when we first moved in i swore the front door would be quickly changed out.  i hated it!  i thought it was hideous.  someone prior to us had painted the door a  forest green color.  it sooo didn't look right with the yellow and orange stained glass. you can see a peak of it in the picture.

ugly, right?  i hated welcoming guests to our home through that door.  we even had a repairman laugh at our door!!   he LAUGHED people!  the only people who liked it were my brother and his wife...and i thought they were crazy to be honest.

but time moved on and four years after we moved in i realized i was never going to buy a new door.  we would need to order a custom size since the opening is not standard and i'd rather use the money towards something else in the house.  so i decided to paint it a prettier, happier green.  and i love it!  others may hate it, but now i am in LOVE with my stained glass door!

i think the apple green embraces the quirkiness of the stained glass.  honestly, you can't find doors like this at the big box stores, now can you?  (some of you may think that's a good thing, too!)  


i ordered the "hello" from back 40 life on etsy.  they made a custom sign for me and were FABULOUS to work with.  i highly recommend them.  i'm loving my "new" door, it makes me happy.  plus, it was WAY cheaper than buying a new door.  i even decided i like the original hammered handle that i used to want to replace.  it's amazing what paint can do!


linking up here

Friday, August 26

updated foyer

one of my birthday goals is to repaint my dining room/living room/foyer area.  the paint is a beautiful dark green.  the rooms don’t get much natural light so it’s like a dungeon in there for most of  the days despite the large windows.  it’s all the darn tall trees that i love in the spring and summer but hate in the fall.
i painted my dining room a little while ago if you recall, and now i’ve painted my foyer.
this was the rare time of day i actually get good light so it looks pretty and bright in the picture, but trust me the majority of the day it’s a little dark.  not as dark as the dining room, mind you, but still dark enough to be depressing.
here’s the after
 
the pictures aren’t as dramatic as the dining room, but i’m really really happy with the color change.  you can see the old color that’s still in the living room reflected in the mirror.
i made the artwork out of fabric using an old canvas from my husbands college days.  it’s been in the garage and has traveled with him from place to place for 12 years or so.  unwrapped.  i’ve never seen my husband paint before.   love that i didn’t have to go buy one and that i finally put the canvas to good use.  i took the inspiration from the pleated poppy’s post.  it dawned on me while i was working on this that the design is the same as one of my favorite quilt patterns called the orange peel i found in an old quilt book.

another angle.  i used to hate my stained glass door, but it’s slowly growing on me.  it only took 3 years to learn to appreciate it’s vintage glory.  (our home is nearly 40 years old)  i repainted the table with a strawberry red (i swear it’s not pink!)  and kind of distressed the edges a bit.  the yellow pail i picked up at the flea market for $5.  i put some very old quilts of my grandmother inside.  there were some of her first and are pretty worn out.  they are not exactly something you want to snuggle up to seeing that they are frayed something fierce, but i love to display them none the less.  i’ve since added a practice quilt of my own which fills out the pail just nicely.  the brown box underneath was also a flea market find.  it holds all my husbands computer cords and hard drives and anything else of his that i don’t know what to do with. 

the sign is above the doorway that leads to the den.  i love it.  i bought the sign here.

the print is just inside by the yellow stained glass door, which is why the coloring is a little wonky.  i bought it here many years ago.  she doesn’t sell it anymore.  i love it.

the best part is i didn't have to buy anything new.   i even already had the paint from when i painted the dining room.  so it was like it was free!

linking up
Photobucket

Wednesday, July 20

new dining room on a budget

i've tweaked and tweaked my dining room a lot, but i think i finally have it right.   i've always LOVED the color green on the walls.  it's so beautiful, so rich, so....dark.  here's a picture of my dining room at 10 in the morning, with the morning sun (and son!) hitting the front of the house.

love how cleaned up the place? just keeping it real.
i didn't touch up the picture at all, this is really how dark it was.  ugh.  there was never a point in the day that you could be in the room without the lights on and not feel like your in a cave.  even though we have a nice tall window and it faces the morning sun the room stays shadowed because our yard and all of our neighbors have wonderfully large trees that i wouldn't trade for anything.  so i decided to ship the kids off to my mom's recently and spent the time renewing my dining room.  so. much. fun.

in addition to painting the room, i had to paint the furniture.  not. so. much. fun.  but desperately needed.  several months ago while the children were painting canvases i somehow mixed nonwashable paint into their washable paint.  nothing would get this paint off!  nothing!  it bothered me every time we sat down to eat at the table.   no matter how clean the dining was, it always  looked dirty thanks to that paint.  new furniture would have been a waste of money considering i'm perfectly capable with a can of paint and a brush.  


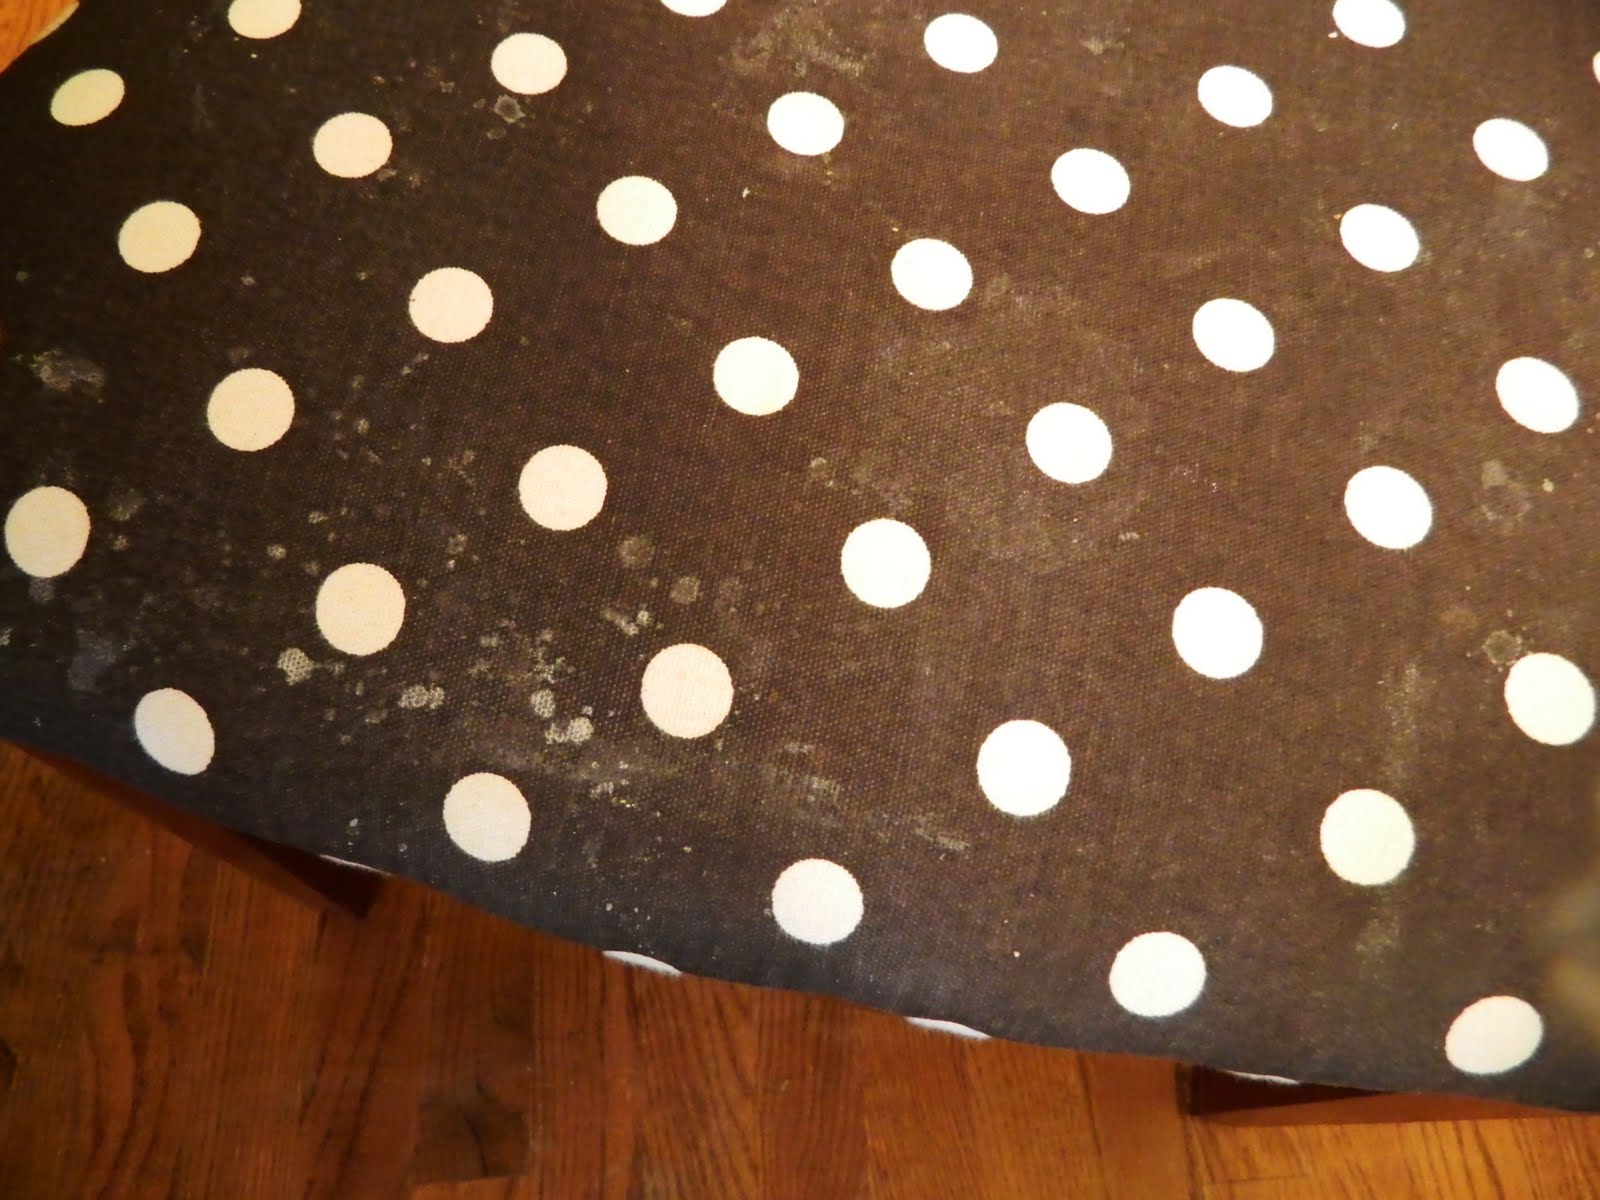
i wanted to recover our chairs again since the polka dot hadn't held up very well.  even though i used stain protectant and i regularly tried to clean the chairs they were no match to my three children.  new fabric would be costly and i hadn't had them on the chairs that long, just since before thanksgiving.  i figured i could throw them through the wash and hope they'd clean up.  
this was one of the cleanest chairs...so gross!

ok, are you ready to see the difference?  remember the first picture was so dark and it was untouched.  this picture isn't touched up either.  same time of day with bright and sunny weather.....

are you seeing what i'm seeing?!  what a difference a shade of paint makes! it's called "air kiss" from valspar. it took about two coats to cover the dark green. can you believe the difference?!  i think a side by side comparison is in order, don't you?  
holy cow!  i'm still speechless when i see these pictures. i promise i didn't lighten one and darken the other.  they were both done on a sunny day at 10am.  craziness.  the blue just reflects the sunlight soooo much.   my chairs came out nice and clean, albeit a little faded.  i painted the furniture a nice muted black and added several coats of poly to the top.  we decided to take the leaf back out of the table and just deal with being a little cramped.  i didn't do much for the decorating except add a work-in-progress gallery wall.  i did make some new napkins and threw my stuffed pears into a bowl to help bring some color and fun into the room. i was worried the pale blue walls and the black furniture would be too...i don't know...too "something that wasn't me."  that probably doesn't make sense to anyone else but me.
little fuzzy but you get the idea, i have at least 4 more frames waiting to be painted

priceless canvas art and a shadow box i made to house our remaining sand dollar collection 

smaller priceless canvas in the top left corner.  i'm praying the daisy plates stay on the wall!

i didn't plan out the gallery wall because that's too much of a hassle for me.  i used existing frames, goodwill finds, and castoffs from my mom to make the wall.  i put some of the pictures against scrapbook paper to give some pops of color.  i like that is still growing and can be adapted on a whim.  i like the eclectic look and i don't think anyone should be afraid to start a gallery wall even if there is no end result planned.   i'm pleased as punch with my new dining room!   all together i spent less than $60....i had to buy the paint for the furniture and the walls (the bulk of the money), the cheap frames, the plate hangers, and the shadow box (bought with a coupon!).   not too bad, huh?

The Shabby Nest  Photobucket

Thursday, December 16

Another Goodwill lamp find

I needed a lamp in my living room something fierce.  Being the frugal girl I am, I headed straight to the Goodwill to find a table lamp.  I had such good luck last time and luckily this time I was not disappointed!  I found a nice big, but not too big, table lamp for $4!!  That's FOUR dollars!  I did have to buy a shade at Target and about choked when I had to spend $12 but I really wanted the drum shade.

I KNOW I took a "before" shot of this lamp.  I just KNOW I did.  But, I can't find it anywhere.  It was one of those typical white and brass deals that aren't very pretty.  (So sorry to anyone reading this and has that type in their home!!)

A quick spray of primer, a coat of turquoise, and then make a few rosettes for the shade and just LOOK at her!  Isn't she beautiful? :)


 I just LOVE the rosette details!!

And this little guy just makes me happy!  I just want to show him off. :)

Friday, November 26

New Dining Room Chairs....again!

Remember way back when I recovered my dining room chairs?

What the heck was I thinking?!  Pale yellow fabric on my DINING room chairs that we eat at EVERY day for EVERY meal with THREE children!

Yeah, they didn't last long.  Big surprise, huh?  I bought new fabric eons ago, but finally with Thanksgiving looming I decided to recover them so my guests wouldn't be afraid to sit on my chairs.  They were THAT nasty. Don't worry, I'm sparing you a picture of them.

Recovering dining chairs is one of the simplest reupholstery projects around.  I think I've done mine about 4 times now and like I say, if I can do it than anyone can!

First, you need to remove the seat from the chair by unscrewing the seat from the bottom.  Then, using pliers and a flat head screwdriver, pry off the staples to remove the fabric to use as a pattern for your new covers.

Or, do what I did and leave the original fabric on and simply draw a rough shape for my chair making sure that I leave enough on the sides to staple the fabric under, usually a good 2-3 inches all around.  It's better to have too much than too little.  When I recover the "recover", I do take off the second  fabric cover simply because it can get too bulky to screw the seat back on.  I never leave more than the original fabric on.  I tried it and it doesn't work on my chairs.

It's a simple staple at the top, pull the fabric tight as you can at the bottom and staple.  Then staple to the left, and pull tight as you can to staple to the right.  Then I proceed to staple around the chair pulling tight without pulling the design askew on the front.  Sounds complicated, but it's not.  You have to take a little care around the corners making sure to pull and fold the fabric just right so it doesn't look to bunchy at the corners.
 Another good tip, is to make sure to leave the holes to screw it back into the frame accessible by trimming the fabric away.
LOVE, LOVE, LOVE my dining room chairs!  They look sorta black in this photo, but it's more of a dark chocolate brown.  I'm in love with them.  Yes, I scotchguarded them and yes, the littlest one has already left marks on it anyways.  I keep scrubbing away at them, but I still find these little spill marks on them from milk of all things.  So I'm in sure in a year I'll have to recover them again. :)  For now though, don't you LOVE them, too?!

Friday, October 15

More Goodwill Love

I've had another Goodwill project waiting for me in my garage for a few months now.  I wasn't sure what I was going to do with it at first, but finally I decided to make a little homegrown fabric art for my littlest son.

I bought this frame for $2.95!  Do you KNOW how much frames cost in the store??  This was ridiculously cheap.  Of course, I bet my husband thought it was $2.95 too much when he saw it in the garage.  Ugly, right?


I turned it into this with the help of a little fire engine red spray paint and some fabric scraps I had on hand.  If you don't have fabric, paper would be just cute as can be and not so "stringy".   Again, like all my projects, I'm not sure I'm in love with it yet.  I love the IDEA of it, but  I think the yellow and striped car doesn't have enough contrast with the polka dot background.  But, like all my projects, I have a feeling that even though I hung it of reach, the littlest one will find a way to tear it up.  It's not that he MEANS to tear things up, it's just he's so curious.  But it looks happy in his room, and he told me he likes it.  And that's all that matters.  So don't be hater if you don't like it!

The moral of this story, though, is to go by the Goodwill BEFORE you head to the store looking for a picture frame, lamp, or other whatnots.  You might not find what you want, but you don't know unless you try!

Wednesday, October 13

my laundry room...before and after

I meant to do post this last week when I talked about laundry, but I got busy and never got around to doing it.  So we're doing it now, ok?

I dug around all our external hard drives (we have a lot, does everybody?) and found the picture of our laundry room before we moved in.
Drab and boring, isn't it?  I mean, the laundry is drudgery enough could you imagine if you had to look at those dark cabinets doing it?  I hate doing laundry, so if i have to do it (and I do) then I might as well make the room as happy and princess-like as possible.

I've shown some pictures of my laundry room, but I've tweaked the decor a little and now it looks like this:

Now, isn't that a much happier place to sort your whites from your darks?  It's amazing what a little paint can do!  We painted the cabinets a bright white and the walls a soft lavender.  I remember the guy at the paint mixing counter thought this was for my daughters room.  Um, no.  It gave me a moment of hesitation because I didn't want it took child like, just girly.  I'm soooo glad I went with it! I love color and I love a little whimsy.
I hung my collection of vintage aprons on the wall, but eventually I'd like more hooks I think to show them off.  I've got some really cute ones, and I didn't have to buy a one of them.  They were all gifts, how nice is that?!
 See that cute little framed fabric dress? I made that.  The frame was this hideous green and gold looking thing that was bound for Goodwill.  Then I had the idea to spray paint it pink and pop in a little fabric art.  Cute, if I do say so myself.  I even stitched up that little hanger!
The little decals I bought on Etsy and I love the glass knobs.  

More happiness here.  I made the wall hanging to cover my fuse box.  I wasn't about to let that ugly gray thing ruin my laundry room.  (The sour cleaning cloths I let sit in there too long before washing already does that!)  

The chandelier is THE best part!  I bought in online somewhere for a steal and I sadly can't remember where from.  Nothing is better at making you feel all princess-like than a chandelier casting a lovely glow down on you while you're putting dirty underwear in the washer.  And please notice my "wash/dry" instructions in case anyone is in doubt as to what to do.

So that's that.  While I wouldn't mind laundry room being a tad bit bigger, it still is a room that makes me happy.  Which is surprising considering just how much I hate doing the laundry.   :)

Thursday, September 30

The Orange Room

the little pillow was made by his sister for his birthday. precious!
Sorry for the picture being so dark.  It's rained for days and I'm tired of waiting for good light.
Remember forever ago when I painted the children's rooms?  Well, finally I'm going to post the before and after of my oldest's room.  He switched with my daughter to have his own room and wanted an orange room.  And, oh, how I LOVE it!!

I'm having trouble find a before picture but you can click this link to see some older pictures from when it was my daughter's.  I used a toasted pumpkin color from Lowe's that had the primer built in and the coverage was spectacular!  I only needed two coats of the deep orange, no extra priming involved! :)  That made me a happy mama indeed.
The curtains were from his room before and the rod came from the bathroom.  The wooden furniture belonged to my husband when he was a kid.  I might not esp. love it but it has meaning and it's free.


I picked up those black shelves at Target so he could have a display space for all his special things.  As much as I would have LOVED to pick out things I only wanted, it is HIS room and he needs to make his own.  
It's his Washington, DC building collection from the flea market.  Love those!  They match a statue of liberty one given to him by his Mamaw and Papaw.


The shark specimen is one of those things I could live without.
But, I do love the vintage books that the shark is on.
Another things is the chair that I don't really love, but he really wanted a chair in his room.  It was only $20 at the Target, so I gave in.  Now, I'm glad I gave in because it makes him so happy.  Plus, it gives his dad and I a place to sit when we go into chat with him at night.
Caleb finally has space in his room for his desk!  Which really means more space for his clutter collections.  And no, just for the record, that's not a real gun!  Just a toy gun from my husband, that was back before they put the orange tip on them.  
My favorite part is the closet where he stores all his legos.  He can just shut the door, and the creative mess is gone!  During the school day, little Ian finds his way in there to play. But, shhhh, don't tell Caleb!

I know it's a little picture heavy, and they weren't the best pictures at that.  I'm just so thrilled with how it turned out!  

His room is so cozy and inviting.  When I tuck him into bed at night, I just want to snuggle down in the bed, too.  I walk into his room and Caleb has the classical music playing softly (Yes, he LOVES classical music! He's older than his years.), the lamp is on reflecting such a warm glow from the orange walls, and he's busy reading a book and then I know I got this room right.  It's perfect for him! 

(Except for the lavender wall in the closet, that still needs to be repainted!)

LinkWithin

Related Posts with Thumbnails